Demo OpenGL Solar System
Introduction
As part of the 5300(Computer Graphics) module at the SAE Institute school, we were tasked with creating a non-playable demo with OpenGL using several different techniques. My choice was a solar system model.
3D rendering
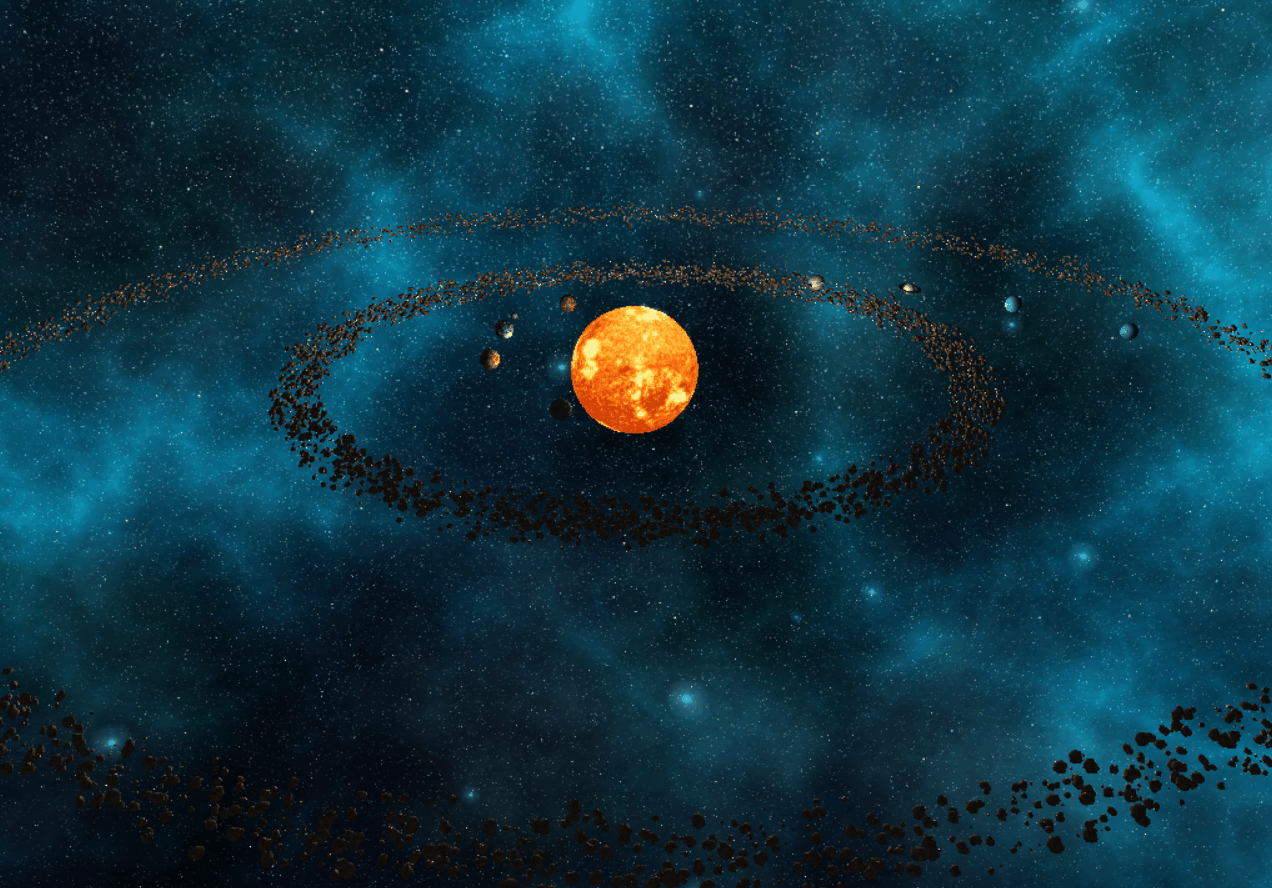
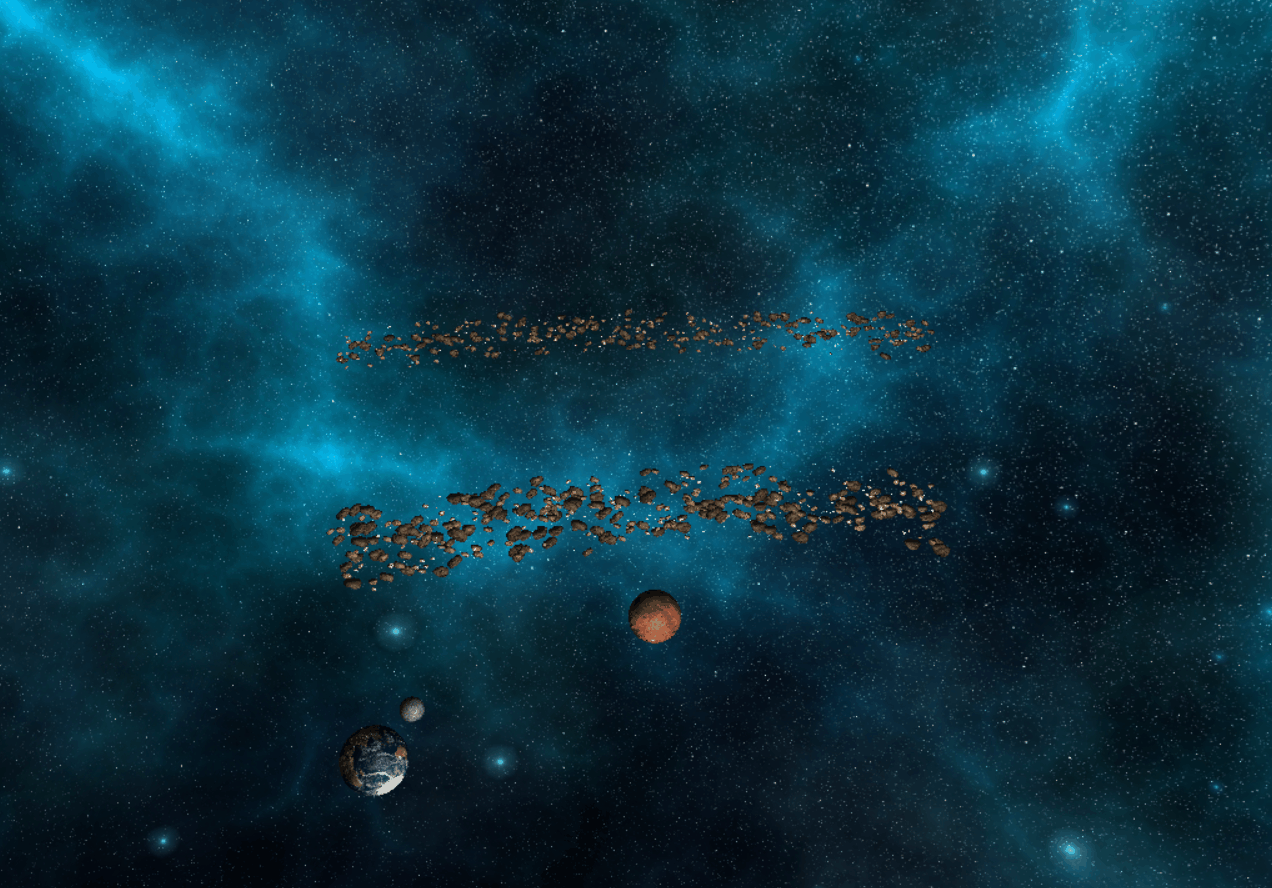
Planets + Sun
The sun is in the center of the scene (0,0,0) and the planets are drawn one after the other from the center of this scene. The planets each have a color texture and a normal map which are applied to the sphere.
Asteroids
Instancing
The technique used for the sun and planets is not appropriate for the two asteroid belts, drawing the asteroids one after the other would be too costly from a performance point of view since what takes the most time is issuing a draw call and sending the data to the GPU. The most sensible solution is to use instancing which consists in drawing several objects in a single drawcall by the GPU without having to communicate again for each object. In our case this allows to send only one texture for the color and only one mesh for all the asteroids.

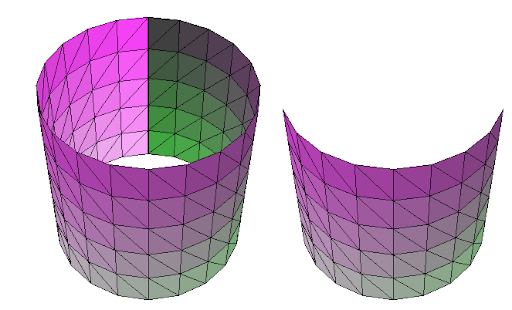
Frustum Culling
Frustum culling consists in drawing only the objects which are in the field of vision of the camera by using a frustum. This technique was used to cull the asteroids since there are 7000 of them in the scene and they are not necessarily all visible at the same time.
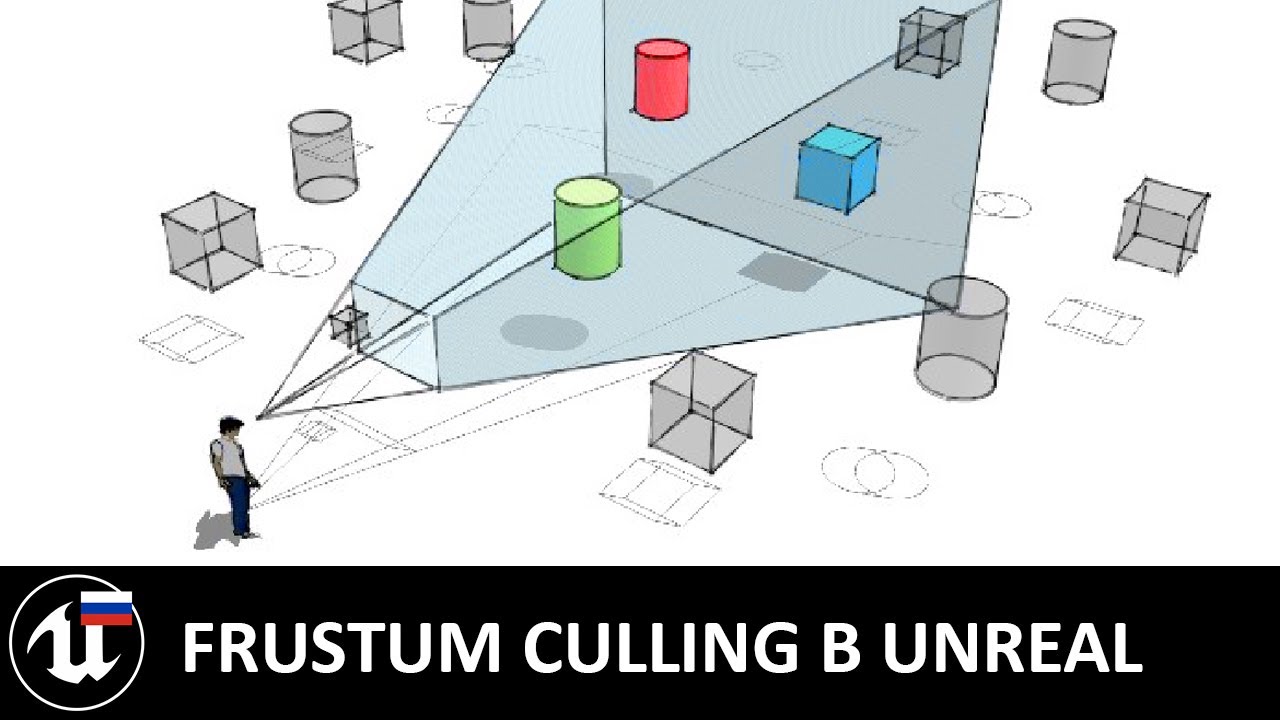
To demonstrate that the Frustum Culling works, the size of the Frustum has been reduced in the example below:
Backface Culling
Backface culling is a technique that allows you not to render the back faces of an object. With a transparent object, backface culling is not recommended in order to be able to see the front and back of the object. With no transparent objects in the scene, backface culling offers a performance gain for not displaying the faces behind planets, the sun and asteroids.
Light
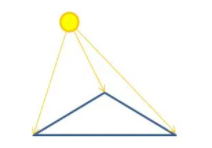
Point Light
For this demo just one light was needed, the one emanating from the sun. The choice of the point light was obvious since it is a light close to the sun (how light works). As it is forward rendering that was used in the scene, it is enough to send the position of the light source to each fragement shader, the light calculations directly calculated in the shaders. As a reminder, forward rendering is the fact of rendering each object one after the other and calculating the light for them individually. The light model that is used is the Blinn-Phong model, it was chosen for its simplicity to be implemented but also the advantage of needing less textures than a solution like PBR. https://learnopengl.com/PBR/Theory
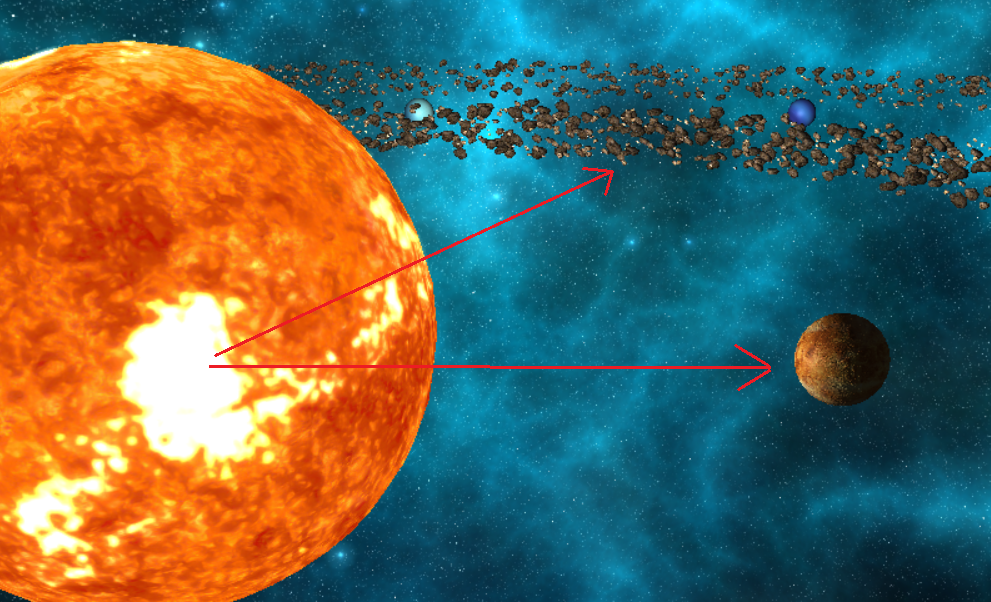
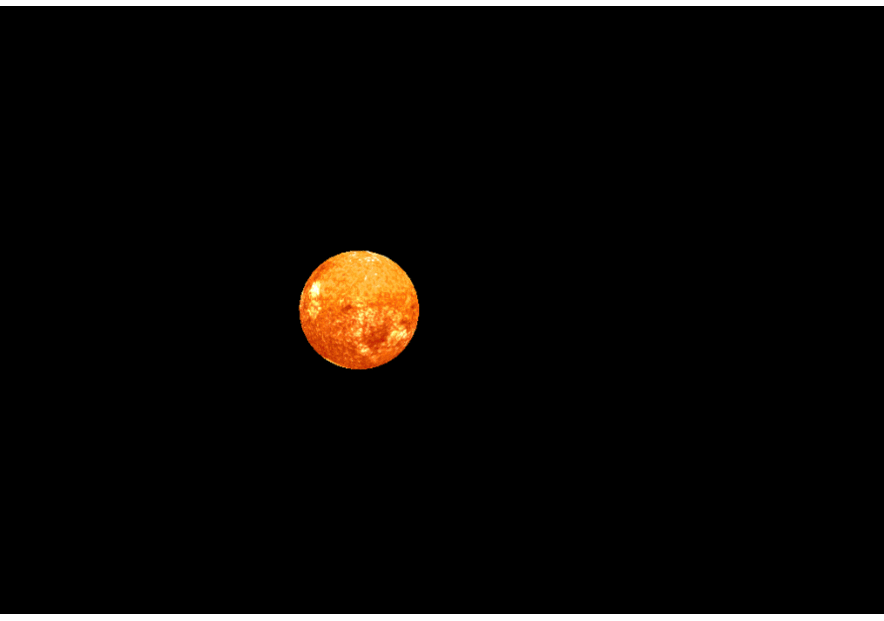
The sun has a different fragment shader than other planets and asteroids. The fragment shader of the sun doesn’t calculate the light so that it is not illuminated. Because the light point is in the center of the sun, it had no light and it was completely dark. Therefore, for the sun we’re only drawing the sun’s texture, without any lighting.
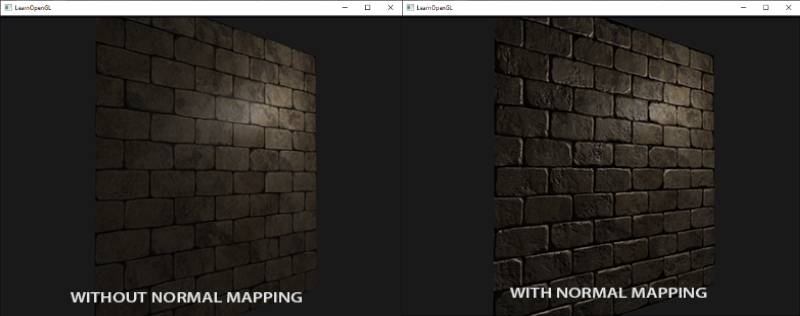
Normal Mapping
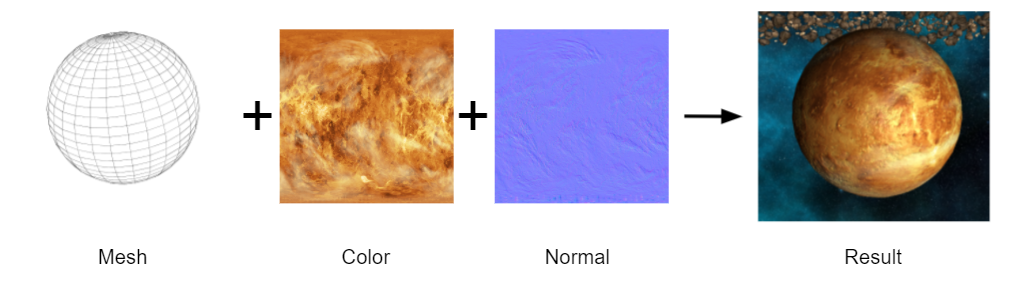
The planet’s meshes are simple spherical objects without any relief, this is an advantage and a disadvantage. The advantage is that it is lighter on the memory and therefore faster to load. The disadvantage is that you lose the details on the objects, for example you can’t see the craters. A solution to this is normal mapping. It consists in giving an illusion of relief on objects by using an additional texture. This texture will replace the normals of the mesh and have a greater definition and give this impression of relief when the light will create unilluminated areas on the object. This technique was not useful for the asteroids because there was already enough detail in the mesh.
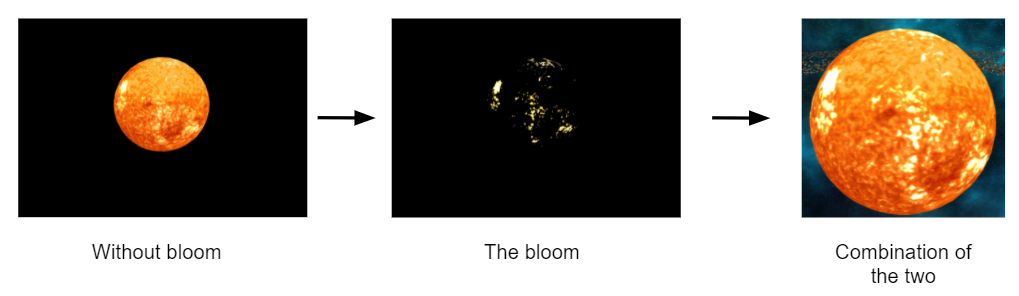
Bloom
To create a bloom effect, the light parts of the diffuse sun texture were written on a separate texture which was then blurred and finally combined with the result of the final pass through the framebuffer.
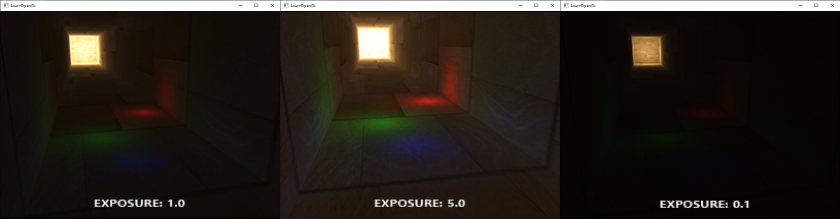
Tone mapping
The problem that arises when adding bloom is that by default in the framebuffer the colors are contained between 0 and 1, this is called LDR. To overcome this problem we use HDR to not limit the colors between 0 and 1. However, as our screens are in LDR, we must switch back to LDR using tone mapping, with for example the technique of Reihnard, used in this demo.
Skybox
Starry background
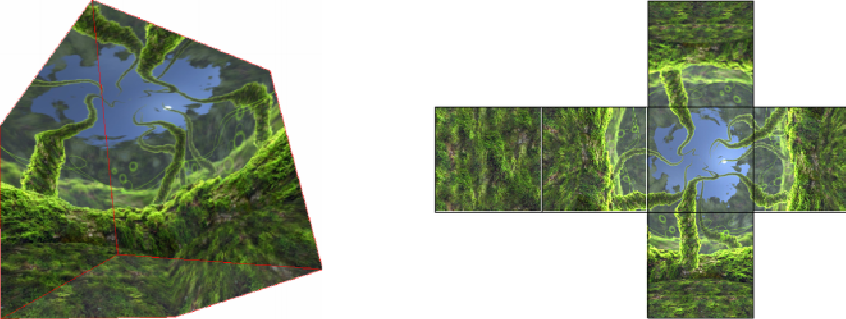
A skybox is a graphic technic that gives the illusion that a three-dimensional space is larger than it really is. To do this we use a texture that contains several faces and assemble them to create a huge box that will contain the objects of the scene.
Conclusion
I learned a lot during this module as mentioned above but it is possible to push the project a bit further. Some optimizations and techniques could have been done like:
OpenGL
- Load only one mesh sphere for all my planets
- Add PBR for a better visual effect
- Add Shadow Map
Other
- Make ellipses with the asteroid belts and not circles
- Adjust the rotation of the planets on themselves which are not correct
- Implement a more complex camera for automatic movement
- Include Star Wars ships (just because it’s cool)
With a better understanding of OpenGL and more time I would certainly have succeeded in achieving his goals.